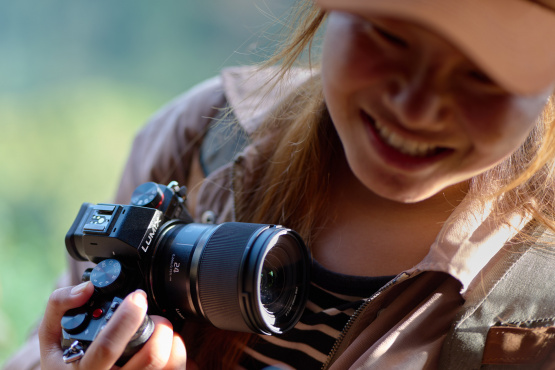


Sensor Size
When is an 50mm lens no longer an 50mm lens? When you put the lens onto a partial frame camera. If your DSLR has a smaller sensor, sometimes known as the APS-C sized sensor, then half the image produced by the lens is discarded, leaving only the middle crop. Because of this cropping effect, a 50mm lens on a partial-frame camera typically gives you a 75mm perspective.
The origins of the modern digital SLR go back to the days of film when lenses for SLR cameras were designed to project an image onto a 35mm piece of film. We still use the same lenses, but the 35mm film has been replaced by a digital sensor. For the best of digital SLRs the transition is seamless, but for the vast majority of cameras sold today the sensor is actually much smaller than the original film. Mirrorless camera systems retain the focal length scale used on DSLR even though they have smaller sensors and their lens design is a significant departure from DSLR.
A 25mm lens on a Lumix or Olympus Micro Four-Thirds camera body is the equivalent of a 50mm on a full-frame DSLR.
The importance of partial frame sensors is most relevant when choosing a lens. You gain extra telephoto reach, as a 200mm lens effectively becomes a 300mm lens, but you lose wide angle as an 18mm lens is trimmed to a 27mm. You’ll also lose a little image quality, as in effect your lens is being put under a magnifying glass, and there is a subtle magnification of observed depth of field.
Priority vs Auto
Auto modes on digital SLRs render every possible parameter to the ideal average. If you want average photos then continue shooting in average modes. If you want to play with the light, to experiment with its potential and discover how to manipulate light for your own expression, then leave the Auto behind and discover the joys of Priority shooting modes.
Aperture priority simply means you select the f-stop, and hence depth of field. Shutter priority means you select the shutter speed. You're still getting help from the camera to meter your exposures, and vary other parameter so keep exposures balanced, but you decide whether to lock down the aperture or shutter and where to lock it in.
In this regard, metering modes are just as important as priority modes. Most confusion over ISO settings come from unexpected behaviour of metering modes. For example, if you take two test shots at different ISO settings, but did not notice minor variations in the relative sky and foreground you may be fooled into thinking the ISO setting caused the exposure to go up or down. In fact it’s the metering that will push the exposure. It’s easy to trick yourself when first learning to use metering.
My default settings are to use Auto ISO but to specify the minimum shutter speed as part of the Auto ISO settings. Typically I want to ensure the shutter does not drop below 1/200th of a second to avoid blur caused by hand-shake. I bump that setting up to 1/1000th for wildlife or when using super-telephoto lenses. I shoot in Aperture priority so I can select lots of depth of field, or very little depth of field. All the while I use Evaluative Metering (the full screen).

AE Lock
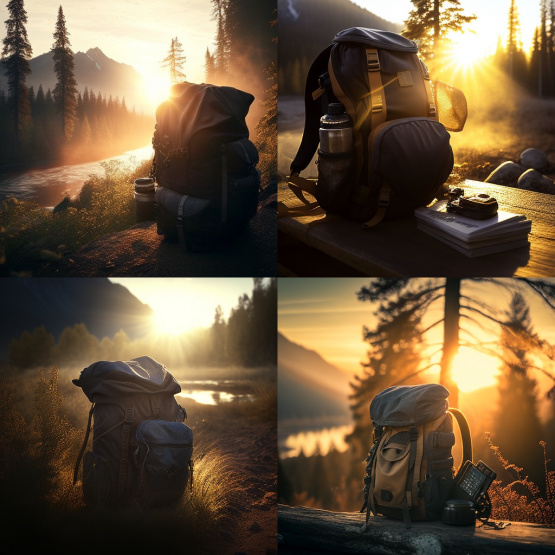
Sometimes we shoot in complex light, and that demands a more complex response when driving the camera. This happens to me a lot, because I want interesting light and avoid anything that is too ‘normal’. Normal is bland. AE Lock (Auto Exposure Lock) is a handy function that allows you to pin down the exposure metering when it suits your needs.
Imagine a scene with a person backlight by very bright sunlight at dawn. If you point the camera at the sun and hit the AE Lock you instruct the camera to hold that metering and apply it to the next frame. I then reframe my scene and what I capture is a silhouette of the subject, because the camera is metering for the bright sky behind them. Alternately, if I point the camera down to the foreground, in the shade, and hit the AE Lock I will end up with an image that exposes my subject correctly but allows the sun behind to blow out.
In this manner I can instruct the camera exactly which light to meter for, instead of letting it try and decide and force it to randomly pick. In situations such as backlighting at dawn the effects are easier to discern, but AE Lock can be handy for more subtle situations too. Once you learn the functions on your camera and get used to how they behave you will have the ability to quickly respond to a wide variety of light conditions and immediately take control of where in the frame your camera is metering.
The alternative is to apply Exposure Compensation, and directly dial in the exposure to be raised or lowered. This can be slow in practice, plus we have a tendency to forget we had it set and spoil the next few frames until we work out our mistake.

What is ISO
ISO is the sensitivity of your camera to light. it can be helpful to think of this as a range of exposures. At very low ISO you need more light to get an exposure, so your shooting range at a particular f-stop demands more light (longer shutter speeds) to correctly expose. As you go to a higher ISO you need less light, so the shooting range requires shorter shutter speeds to expose the same scene.
ISO does not change your exposure though. It just changes the range in which the camera will try to capture.
If you want to explore the impact of ISO on your captures I suggest you try very different ISO settings. Start with ISO 200 and compare that against ISO 3200. If you make very small changes and look for an impact you make it difficult to learn what is going on.
If you read too much about ISO performance of various cameras online you would be convinced that all cameras are terrible. Online forums have a tendency to look at relative flaws and lose the wider context. Most cameras today have very good ISO performance, and in most situations it is better to suffer a little bit of image quality degradation than have a blurry shot.
There are two issues that very high ISO can create with image quality. Noise is what most people fear, something akin to grain on film. Noise is a result of having not enough light and you get undesirable artefacts of colours and textures. Noise can be mitigated with good RAW workflow software, but as always there is a trade off. The more you clean up noise the less detail you retain.
The second issue is dynamic range and this is much more of a real world problem. The higher your ISO the less dynamic range you get back in the images, which means you lose subtle colour tones and gradations that make an image look velvety and rich. On a current full-frame DSLR you don’t begin to lose dynamic range until you go above 6400 ISO, so it’s worth noting where the limits are and try not to avoid ISO movement for the sake of it. Remember, a little ISO noise is better than an entire frame gone blurry.
I use Auto ISO most of the time. It’s great when shooting wildlife and I need very high shutter speeds. Even in broad daylight I will can working at ISO 6400 in order to get access to shutter speeds of 1/4000th of a second. Day to day shooting I have my Auto ISO configured to keep my shutter speed above 1/200th of a second, so that my portraits and street photography is nice and stable and I don’t have to worry about moving from bright light to shady indoors.
Try not to worry about noise when using the advantages of ISO. You only get noise when you simply don’t have enough light. And if the light is that low it’s typically very flat and lacking in inspiration anyway.

Diffraction Limits
Diffraction is one of the hardest problems to recognise for photographers, as it’s very inconvenient and turn up when quality counts most. The effect of diffraction is like having a weird kind of focus problem, where every light source creates a halo. It’s most obvious when working with large prints, or when you crop a lot into an image.
In the days of shooting film it was common to talk of lenses that were “diffraction limited”, which essentially meant the lens is so good that you can even see diffraction under certain circumstances. When everything went digital the standard for a good lens was raised considerably, and now we think of pretty much any lens as having a diffraction potential unless it’s really dreadful.
The key to understanding diffraction is aperture. At very large f-stops the effect of diffraction is most obvious.
We think of light as moving in a straight line, but in fact it does bend. When the aperture is wide open (very small f-stops) there is a lot of light flooding through and the little bits on the edge that bend are insignificant compared to the overwhelming volume moving straight. When you jump across to a very narrow aperture (very large f-stop) the amount of bendy light ‘on the edges’ is now a much larger proportion of the overall exposure.
This is the impact of diffraction. You are literally throwing an echo of the image all over the scene due to that bendy light. The effect is most obvious at an f-stop around f/22 for example, and negligible at f/2.8.
Most people don’t look for diffraction and are unaware of it. You may not see much impact on an A4 sized print, or on your Instagram. It’s easy to overlook if you’re not aware, and if you’re dedicated to landscape photography and want the most depth of field possible then you’re always tempted to push to higher and higher f-stops.
The other problem with diffraction is that it’s not an absolute. You get increasing degrees of it as your f-stop goes higher, so defining a boundary to limit your f-stops is arbitrary and subjective. I don’t go above f/8. Is there a huge impact going from f/8 to f/11, no. That’s the problem, the effects are small with each step yet large when you fail to draw the line.
I recommend anyone who is serious about their landscape photography, and want to print big, to run their own test. Setup the tripod and shoot a rock with lots of texture. Focus on the rock with f/2.8 and make that your baseline shot. Then step through the f-stops, for example at f/4 then f/8 then f/11 then f/16 etc. When you get back to your desktop have a close look side by side and see if you can see a difference. I know you will. From here it’s your call as to how far is too far to ensure you have the best image quality.

RAW vs JPEG
A RAW file is not an image, it’s a big data stack that has the potential to be many different images. With the right software you can spend less time working with RAW files and get better results than if you stick with JPEG.
JPEG was designed as a response to sending images over a narrow bandwidth. They’re efficient and offer degrees of compression from harmless to catastrophic. They are a terrible choice for preserving an image for future processing. JPEGs are a flat file, meaning every pixel has a depth of 1 and can be set to a finite colour. This has profound implication when editing an image, as any adjustments you make will result in some data being destroyed (thrown away) in order to leave behind the altered image. This even applies to something as subtle as white balance.
When you try to adjust contrast or curves with a JPEG file you are playing a game of musical chairs, where some data gets turfed when the music stops. Once you blow out detail it’s gone forever. All this changes with RAW because you’re able to draw from the layers of extra captured data that cannot normally be represented in the image. With the right software you can control precisely how you draw on those hidden layers of data. This is very powerful and explains why you can generate such a wide variety of high quality images from a single RAW file.
Working with RAW doesn’t mean you can take a bad photo and make it great. It does mean you can access that additional 20% of quality that is otherwise discarded when shooting with JPG. While it’s true that RAW places an emphasis on image quality, with the right software it can also become very efficient too. If you need to make small changes to a large number of images, then RAW files with RAW workflow software will save you a lot of time and effort.
If on the other hand you rarely edit your photos, or have a love-hate relationship with computers anyway, then RAW is not for you.
If you're already committed to RAW but are still using Photoshop to manipulate the files then it might be time to step into the 21st century and invest in RAW workflow software. Packages such as Lightroom (Adobe) or Capture One (Phase One) do more than just edit a RAW file, they help you to manage large numbers of RAW files and save time by accessing and updating more than one file at a time. They also aid with managing Metadata so you can track the origins and keywords of images with less effort.