

Update Nov 2023
This blog-post has proved very popular but a lot has changed in the decade since I wrote it! If you're interested in a very quick and straight to the point discussion on shooting auroras, checkout the following YouTube video I made...
Light Guides
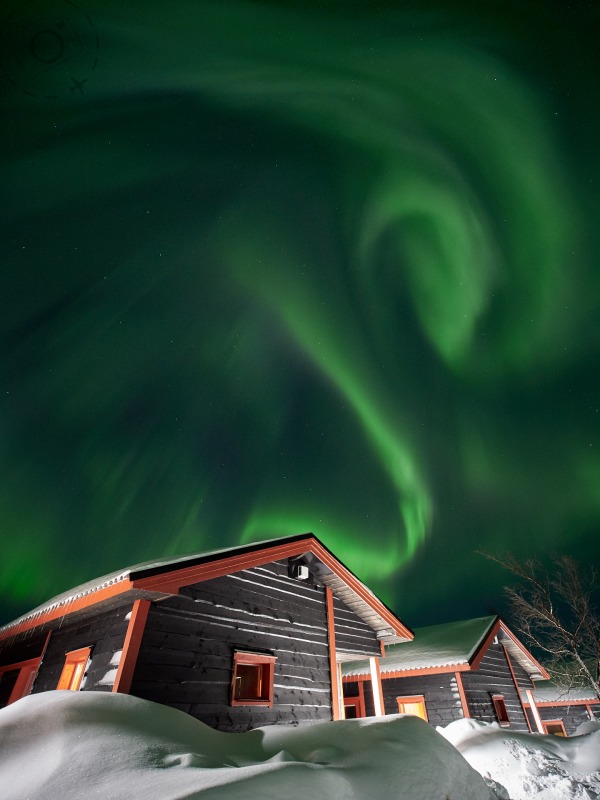
In a fishermans cottage on the coast of Lofoten I sit down to review my shots from the evening. The camera is full of frames that all look alike, with variations in the curve and intensity of the northern lights. Before I can look at more than a dozen our guide, Gunnar, has pulled up his collection on the laptop and suddenly my gentle swirls of green look kinda boring.
When you live in the Arctic and spend your time chasing the Aurora Borealis you end up with a pretty decent collection of images. As a traveller heading to the region in search of a great photo the challenge relies on a bit of luck and considerable patience. Being in the right part of the world to see the Aurora Borealis is no guarantee that you will see them, as the local weather conditions and solar wind variances conspire to make the perfect combination something special.
Chasing the Sky
There's no certainty of seeing the lights just because the sky is clear, but if all you have above is clouds then you can be certain of failure. Guides on the coast of Norway will drive into Finland or head for the lee of mountains in search of some clear skies. It sounds a little crazy, and the winding roads covered with ice and snow add a little challenge to the chase.
But this is how they deliver on the northern lights experience in the far north, provided they have enough local knowledge of the weather conditions plus a handful of phone numbers to call ahead to towns in any direction. Driving 200kms in a single night is perfectly common for the most dedicated guides, the kind of people who catch sleep in hour blocks instead of all night.
The last two years have been some of the best on record in a decode of Aurora activity, partly explained by what astronomers observe as an eleven-year cycle of the sun. Solar flaring is the source of the Aurora, a burst of high energy radiation that collides with particles in the earth's atmosphere. Cycles in the activity of the sun induce cycles in Aurora activity here on earth.
2014 has been the peak of the most recent "Solar Max", although the 2002 Solar Max was even more impressive than the current one. As the activity of the sun settles down again we'll start seeing a little less Aurora activity as we head towards 2020. That doesn't mean there wont be spectacular displays in the next 12 to 24 months, but the number of nights with high level activity will be gradually fewer.
Light Locations
Picking the right place to begin your pursuit is more critical that you might think. You want to be far enough north to get a look at modest aurora events. Iceland hits the band of high energy on most nights when aurora activity is predicted, but the oceanic weather patterns that govern it's skies often result in cloudy skies as well.
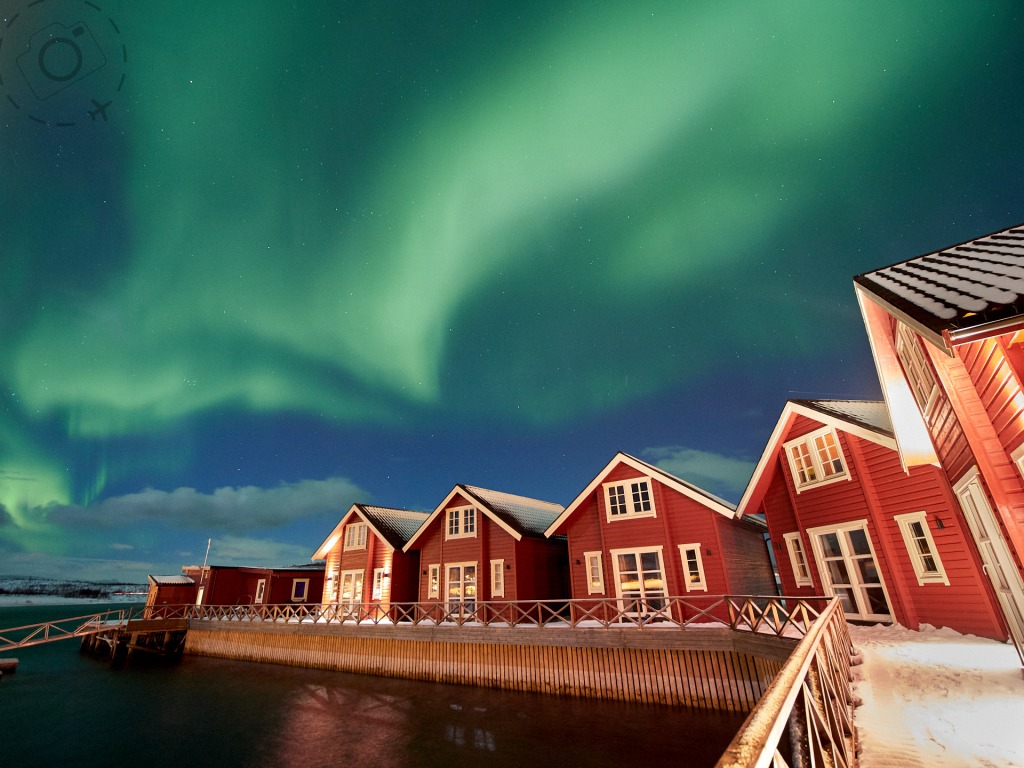
The coastal regions of Arctic Norway are further north and equally good for seeing the Northern Lights. Tromso and Lofoten are the hot names to head for, each with different geological features that improve your chances to shoot. Tromso is surrounded by tall ranges which can provide respite from ocean weather and clouds. When the northerly winds bear down on Lofoten they bring dry air and clear skies.
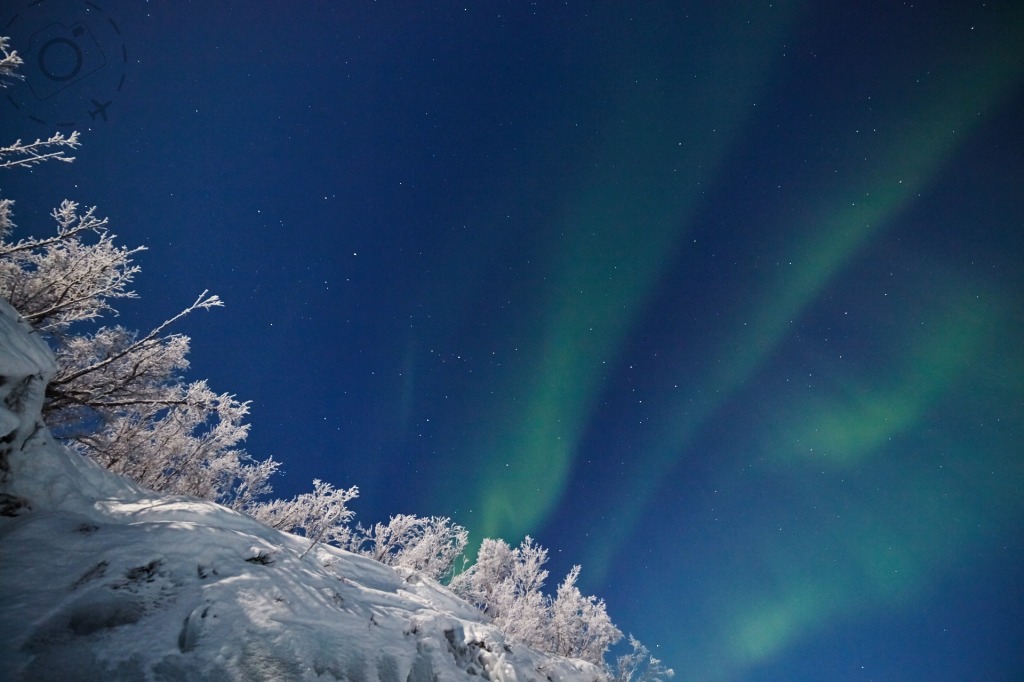
Swedish Lapland has a unique weather pattern that also leads to clear skies and good sightings. The winters are typically much colder in Arctic Sweden than the nearby Norwegian coastline, too far from the waters of the Norwegian Sea to get any warming effect. Cold air makes for clear air however.
Abisko National Park is a special case again where the large frozen lake and tall mountain ranges to the west create a "rain shadow" effect, keeping the skies above Abisko clear on more nights than anywhere else in the region. I've stood on the ice of Lake Torne, below the Abisko Sky Station, and looked up at clear skies above while to the south and east the skies are heavy with cloud.
Lucky Arrival
Planning a good destination is essential, but luck still plays a part. I've spent several weeks at a time on the islands of Lofoten, enjoying nearly all clear skies one week and nearly all cloud the next. There are never any guarantees when chasing the Northern Lights.
Even if you have clear skies the next bit of luck is cosmic in scale, as you wait for the solar winds to arrive that drive the aurora light show. You can download apps to your phone that predict the activity for the night, and report real time levels with an alert. But you will never know in advance what time of night the activity will arrive, and how strong it might be.
In spite of all we know and monitor about the solar winds, our ability to predict what time of night a particular location might see some activity is generally poor. This means heading out into the night as early as possible and waiting for the show to start. Even when the Northern Lights arrive and start flashing around the skies the next problem is the uncertainty of how long they will last.
That initial flurry of waves may be short lived, followed by ever fainter and more disperse colours in the sky. To the naked eye a wide coverage of low level aurora can look like a thin layer of cloud above, only revealed to be green with a long exposure on your camera. I recently got a team of photographers out of bed at 1am to chase some lights, and they were still pumping with coronas and curtains two hours later. That doesn't happen often, but it does happen.
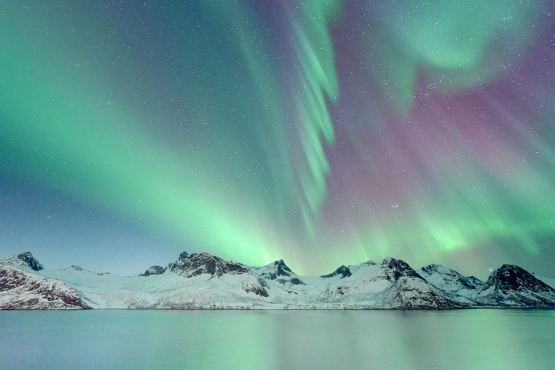
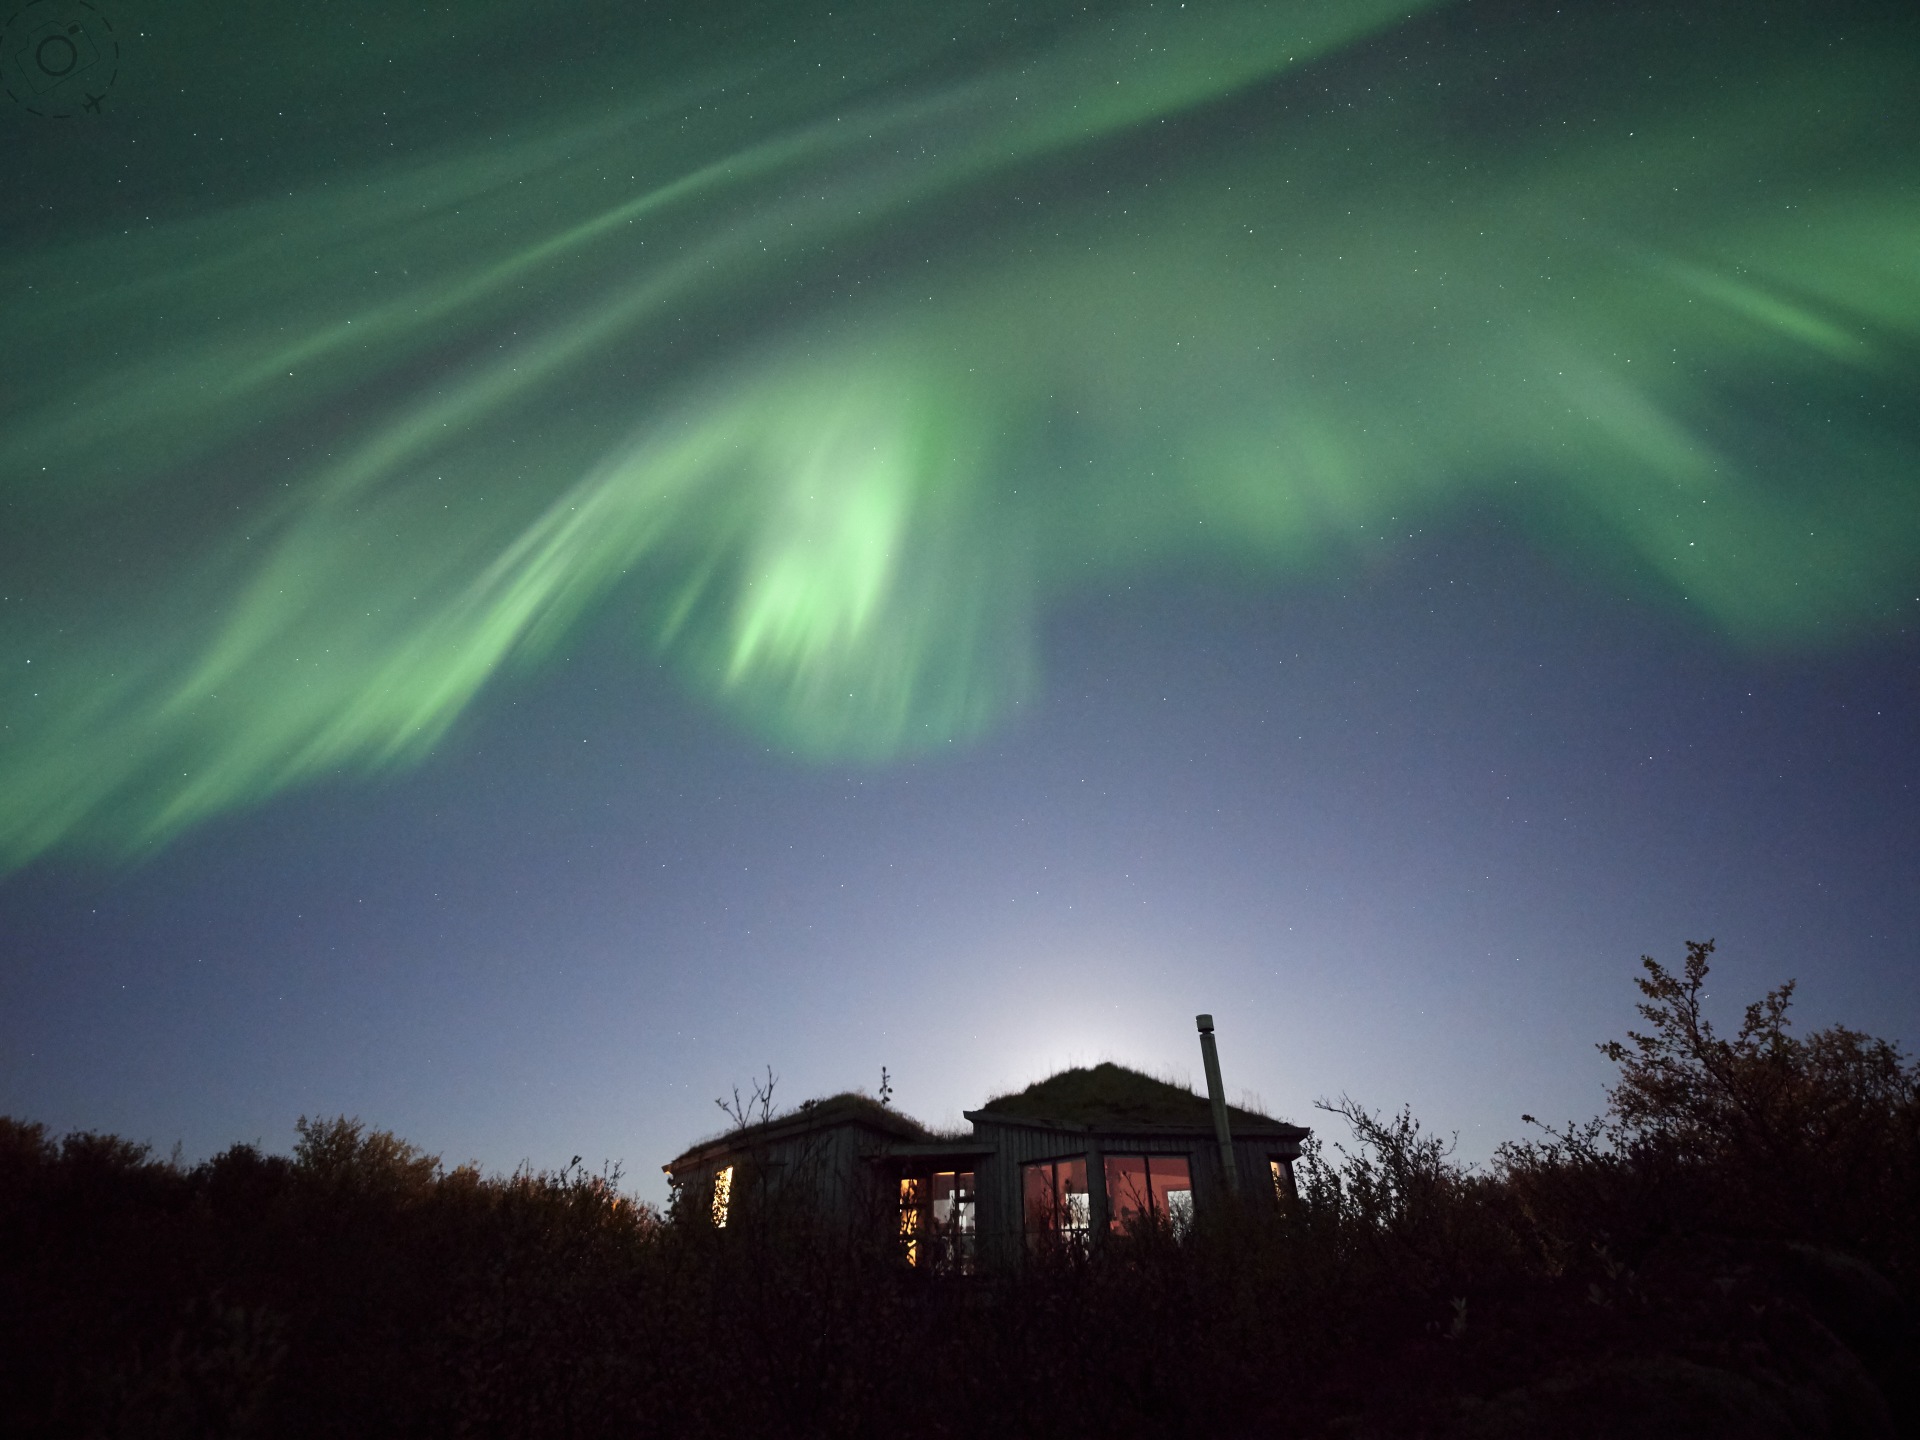
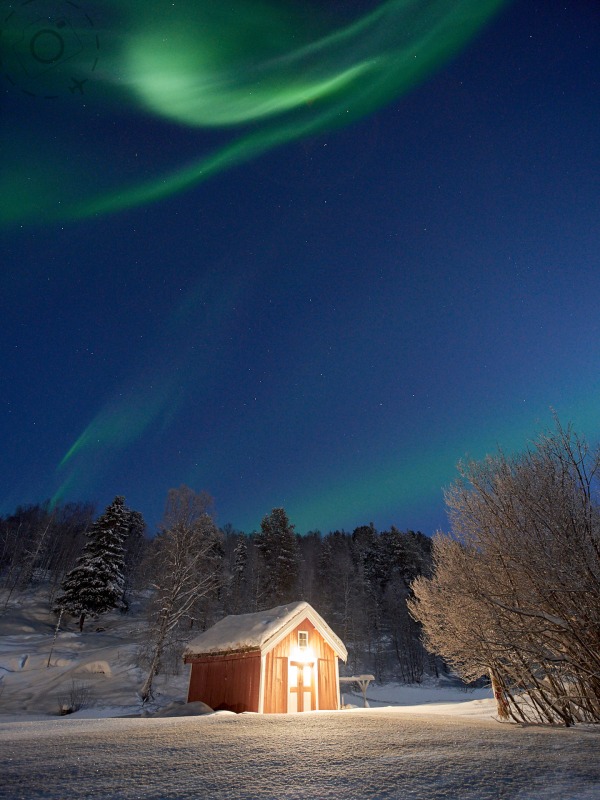
Curtains and Coronas
The northern lights are not a single kind of display, they are characterised by many forms depending on how close you are to the atmospheric collision and how much energy is involved. When a big burst hits directly overhead people report seeing a corona, long streaks of red to green light that starts high above and shoots down towards the earth. From a hundred kilometres away those same coronas appear as a curtain of light that dances across the horizon. Ribbons of colour run across the sky, changing direction and intensity with the waves of energy.
This is where exposure times become critical to the process, as the fast moving curtains shift their pattern from one second to the next. A slow 10 second exposure will end up layering a series of curtain and appear as a smooth fill of colour. Shorter exposure times demand higher ISO settings, or a faster lens. If you can get down to 2 seconds on a dynamic Aurora then you can capture the patterns of light and convey a sense of their character, but now you need a very fast lens indeed or to push your ISO to the limits.
Working at an aperture of f/2 instead of f/4, for example, is very demanding on your ability to focus accurately in the dark, a skill that requires close examination of test shots as you seek to get the stars pin-sharp. It also means that integrating foreground and some of the landscape into the image becomes tricky, as you're almost certain to have softness somewhere in the frame.
Opening Night
The first time you get a chance to shoot the lights it's possible your camera will see the colours better then you do. Super sensors and slow shutters can extract every hint of colour from a dark night, and the low intensity events often look like a bit of haze in the distance instead of an atmospheric collision. A typical exposure of 10 seconds at f/4 and ISO 3200 will pick up faint lights that your eyes struggle to interpret, but as the energy rises you can start dropping the shutter speeds or ISO to match.
Your first few sessions shooting the lights will be filled with anticipation over the slightest wave of aurora in the frame, and then filled with excitement if the action hots up. It is a genuine challenge getting that far, logistically and technically. After one or two good nights of action you may be less eager to interrupt a nights sleep, but this is where the effort to persist is most likely to pay off.
Armed with a game plan for an aurora shoot, and a little experience on what to expect, you can plan out a more constructed composition that puts the landscape to work. On a night with a strong moon the faint auroras can easily get lost, but the big ones don't. A moonlit landscape and modestly powerful Aurora Borealis combine to make the most memorable of night shoots.
Have a Game Plan
The key here is getting away from the towns and into the scenery, and planning where you want to shoot. Most of the activity will concentrate on the North and Western skies, with only seriously big aurora events popping overhead or heading south. Even when this happens you can be certain that something will be active in the west as well, so review your local geology in the daylight for potential sites that evening.
This is one reason why locations such as the Abisko Sky Station are so special. In the early part of the evening you take a chair lift to the top of the mountain, you're greeted with a hot meal and warm room to take shelter, and can leave your camera running outside shooting frames of the night sky.
Local knowledge of locations is invaluable when chasing the lights. Having invested so much effort into travelling to the right part of the world, it would be a shame to miss out on a good opportunity to shoot just because you didn't have a well informed guide to get you to the right location. Being willing to drive all night in search of clear skies is one thing, but knowing where the scenery is worth setting up a tripod is another.
Slow and Lovely
On those nights when the Aurora is being gentle the alternative is to switch to very slow shutter work and capture the landscape in detail. The northern lights become an embellishment of the scene rather than the main event. Shooting landscapes by moonlight for example, with the added bonus of some gentle aurora hues, makes for some great photography.
Shooting down close to the waters edge allows you to capture the light reflected off the ocean, adding another element to the composition and making for a more engaging landscape image. With the help of a cable release or timer-remote you can push the exposures out to 2 minutes or even longer, turning those chunks of cloud into wispy streaks and the ocean into a silky smooth reflection of the night colours. It's not the classic northern lights image we think of when chasing the light, but it's a worthy backup plan if the big lights are not coming out to play.
Patience is essential when chasing aurora shot, waiting for a good show in the sky or just waiting for good weather. Picking a time to travel when the conditions are coldest will yield the best results. Colder weather is better for clear skies, mid winter is better for long dark nights, and as the mercury plunges well below zero the shooting conditions get easier rather than harder. Sure you have to rug up to stay warm, but that's true at -3 degrees or -13 degrees.
With temperatures close to zero you often get problems with condensation on the lens. Standing out in the elements for hours with a lump of cold glass tends to attract the slightest variation in moisture from the air, and it can be hard to detect a little fogginess until it's too late. As the temperature heads towards -20 the chances of condensation drop away because the air is too dry.
Just one more factor which makes hunting the Northern Lights a serious challenge, and the rewards deeply satisfying.

Basic Settings
A typical setup for shooting the aurora is ISO 3200 for 10 seconds and f/2.8. If the lights are very bright that night you may want to slow down to 5 seconds or lower the ISO. Do remember that the image displayed on the camera while out shooting usually seems more intense and bright than when you get it back on the desktop. Most people underexpose their aurora due to concerns over high ISO, or because their wide angle lens is not fast enough. In more recent years I've been using Dual ISO camera bodies, like the LUMIX S5, which have a clean signal at ISO 4000 and are perfect for shooting auroras.
Light Lens
Wide angle is essential for shooting the aurora. A 24mm perspective is simply not wide enough when the show goes cosmic, you really need 16mm or even wider if possible. You also want a fast lens for the job that offers f/2.8, otherwise you have to slow down the exposure or bump up the ISO even more. The Sigma 14-24mm F2.8 is a great option, or even one of the more affordable Rokinon/Saymang 14mm F2.8 MF lenses. Manual focus lenses are nice for auroras as they are easier to adjust focus in the dark!